
AI Clothes Changer with a Webcam: 3 Outfit Ideas to Try Live
Try a white suit, frog costume, or mecha armor with a webcam. Use three outfit examples and a repeatable shot plan to compare your live previews.
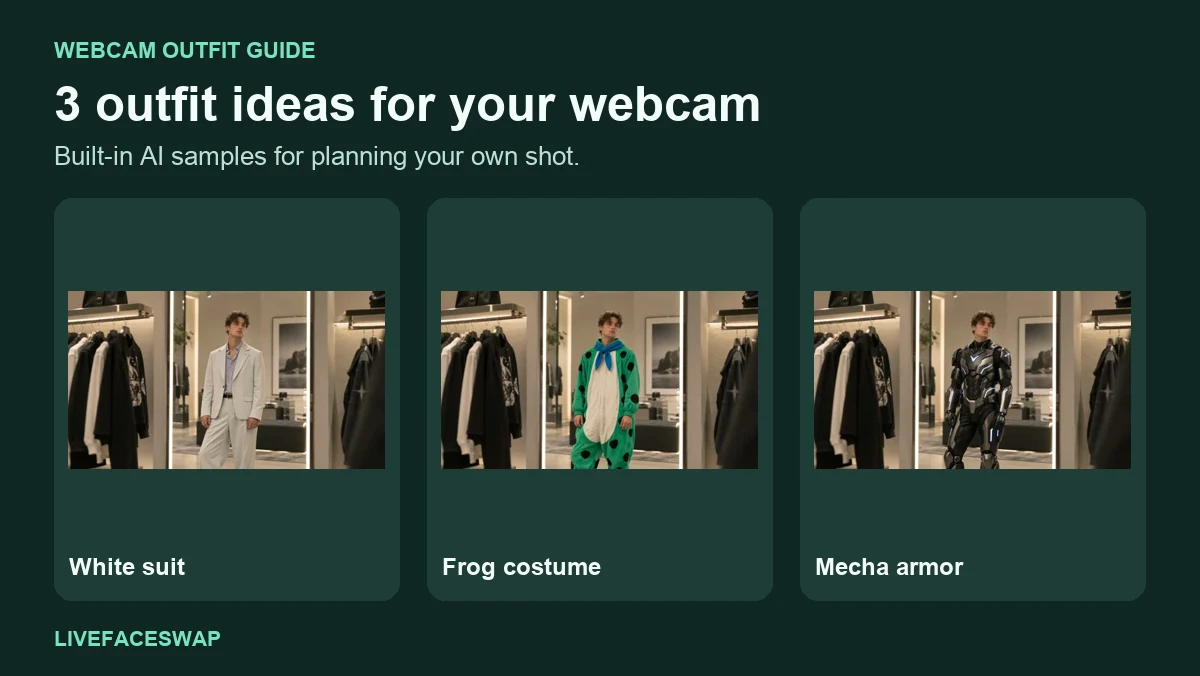
A white suit, a frog costume, and a set of mecha armor make very different webcam shots. The suit draws attention to the collar. The costume changes the outline around your head and arms. The armor adds edges you can watch as you turn. If you’re trying an AI clothes changer for the first time, those differences give you three concrete things to check.
This guide uses the built-in outfits in the LiveFaceSwap try-on studio. Each example shows the garment reference, the original sample frame, and the generated sample. Use them to choose a look and plan your own shot. The figures and montage use stills from prerecorded provider examples, so they illustrate the appearance of the outfits. To see how a look responds to your movement, repeat the suggested action in your own live session.
A 24-second montage of built-in stills. Each outfit comes with one detail to check in your own webcam take.
1. White suit for a polished waist-up shot
A white suit can make a simple talking shot feel more dressed up. Start with a waist-up frame so you can see the lapels, the shirt opening, and both sleeves. For a full suit reveal, step back far enough to include the trousers. Start with the angle you actually want to use in your clip. A close shot tells you more about the collar, while the wider shot lets you judge the suit as one outfit.
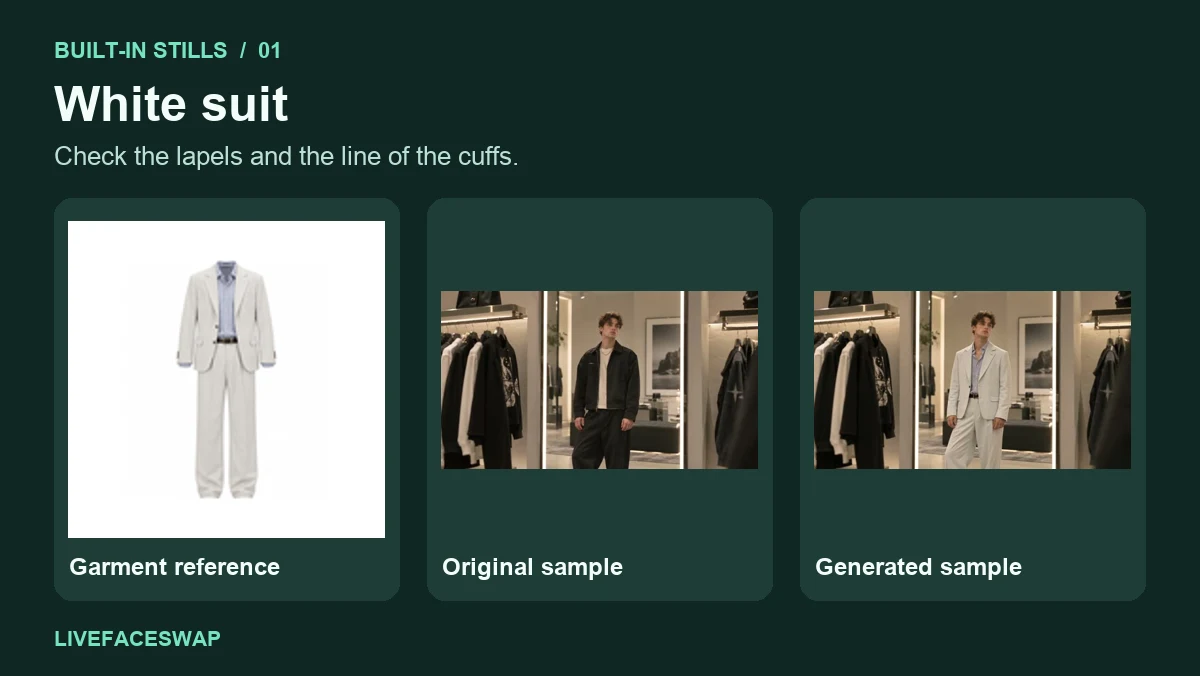
Hold the opening pose for a moment. Then lift one hand to about chest level, as if you were introducing something on camera, and lower it. Replay the section where your hand passes near the lapel. Look at how clearly the jacket edge and cuff read from the camera distance you chose. If the sleeve goes out of frame, move back a little and use the same gesture again.
The pale fabric makes this a useful shot for checking contrast with the room. A bright wall and strong backlight can make the jacket’s outline difficult to read. Try even light from the front or side and compare the input view before you start another take. If you like the look and want to buy a similar suit, use the shop’s measurements to choose a size. See the guide to try-on accuracy and fit for a worked example.
2. Frog costume for a reaction clip
The frog costume is an option when you want the outfit to carry the joke. The hood and green shape should be readable in the opening frame, even before you make a gesture. Leave room above your head and at both sides of the frame. If the camera is close enough to cut off the hood, start with a wider view and move in later if you want a close-up.
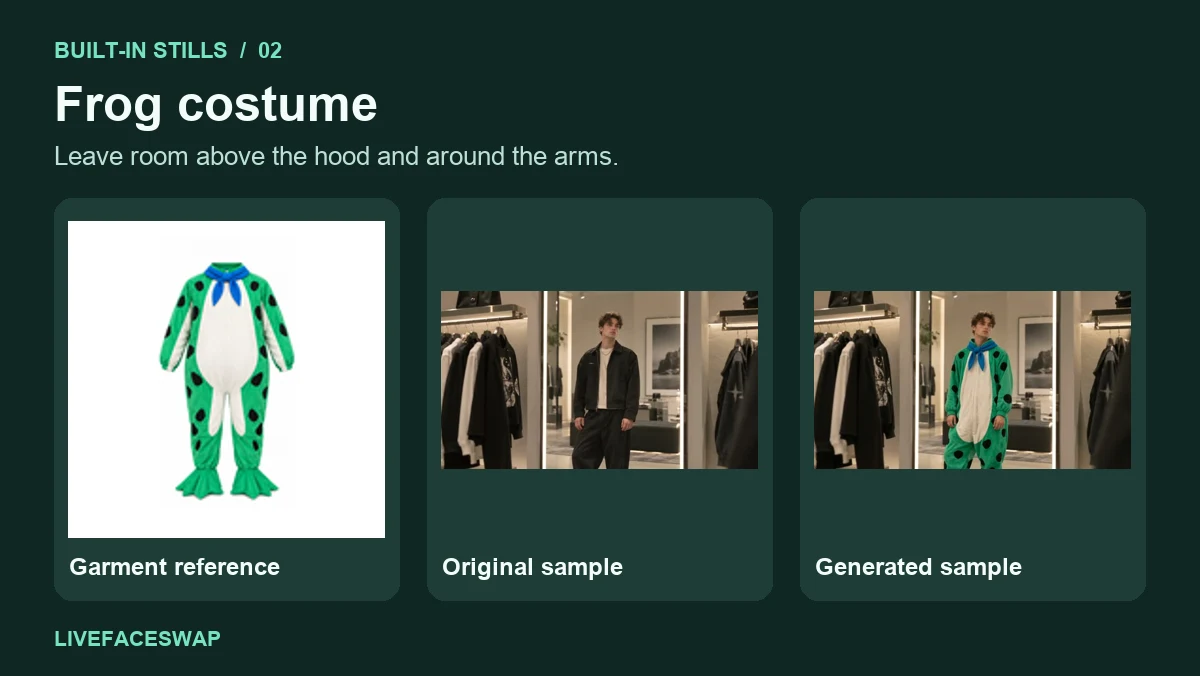
In the built-in sample, the green body and blue neck detail are visible while the top of the head remains uncovered. If you want the hood up in your own take, check for it explicitly and consider a reference that clearly shows the hood worn up.
Try a short two-beat take. Look directly at the camera, pause, then lift a hand as if you’ve just noticed someone. Keep the elbow in the shot. Play back the clip and check whether the hood stays easy to recognize while you move. Watch the area where the hand crosses the shoulder. If the costume shape changes there, try moving the hand out to the side so the two outlines stay visible.
For a small video thumbnail, one clear pose can matter more than extra action. Pause on a frame where the hood, face opening, and a little of the body are all visible. Compare that frame with the costume reference. If the preview reinterprets a detail, decide whether the overall character still reads at the size viewers will see it.
3. Mecha armor for a character reveal
Armor works well as a reference when the visual idea depends on shoulders, chest panels, or a strong silhouette. Stand where the camera sees both shoulders before you move. If you want a three-quarter character shot, leave more space on the side you plan to turn toward. Start the test from the front so you have a clear reference frame to compare later.
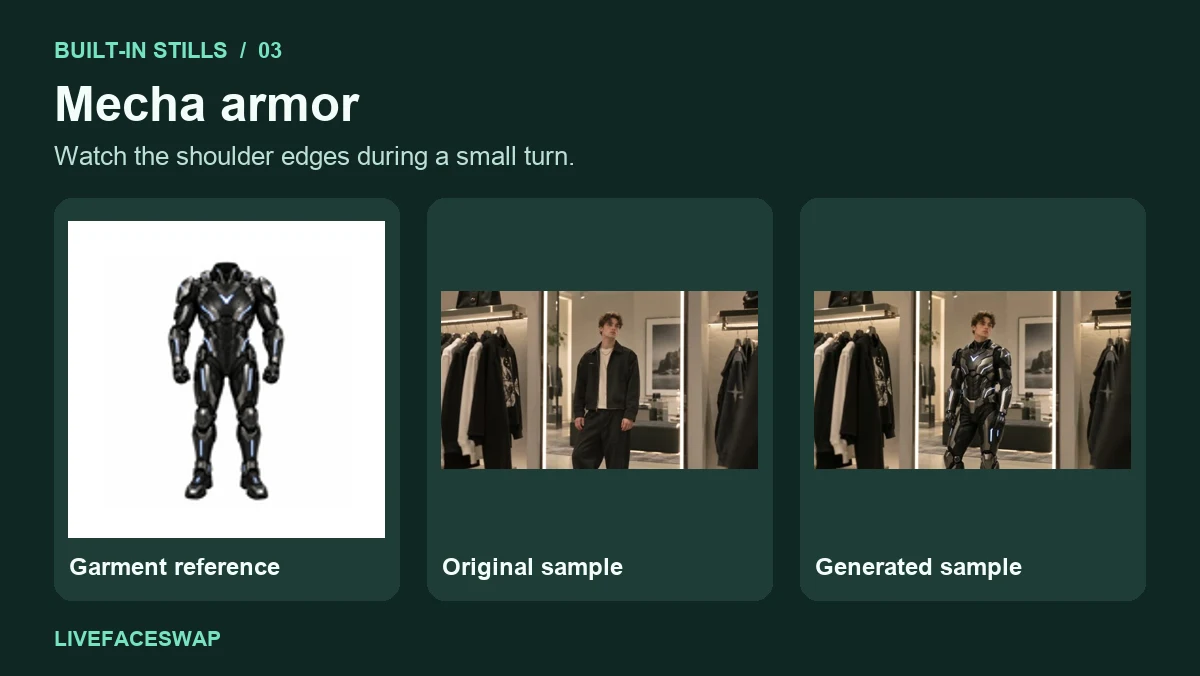
Turn a little, pause, and return to the starting pose. Check the nearer shoulder, then look at the far edge where it starts to disappear from view. If a panel or highlight changes during the turn, pause at that point and decide whether it distracts from the shot. For a simple reveal, a slow turn with a short hold may give you a cleaner moment to cut on than a full rotation.
The panels and highlights are generated visual details. Look at the ones that matter to your character. A change in a tiny accent might be fine for a quick clip. A change in the shape of the shoulder may be more visible. Keep the same lighting and camera position when you compare takes so you can tell which changes are tied to the outfit or pose.
Compare all three with the same shot plan
If you want to decide which look works best for a video, begin with one camera position for all three. Keep the background, lighting, and starting pose consistent. Save the shorter comparisons first, then adjust the framing for your favorite outfit.
| Moment | Action | Detail to review | | -------- | ------------------------------------------------------ | ---------------------------------------------------------- | | Opening | Face the camera and hold still | Suit lapels, frog hood, or armor outline | | Gesture | Lift one arm and lower it | The sleeve edge and where the hand overlaps the outfit | | Turn | Turn your shoulders slightly and return | Whether the collar, hood, or shoulder remains recognizable | | Playback | Pause on the clearest frame and the hardest transition | Whether the clip still communicates the intended look |
Choose an outfit in the studio, open the camera to check your framing, then review the rate and processing notice before starting generation. Record once the result appears. Use Stop when you finish the live session, then replay and save the clip before you leave the tab. To compare a second outfit, finish the current session and switch references. The webcam setup guide covers permissions and framing, and the camera privacy guide explains where the preview and recording go.
Pick the take that works at the final viewing size
Before choosing a clip, watch it at roughly the size your audience will see. A waist-up suit shot can work well in a small player if the lapels still stand out. A frog costume might need more room above the hood when cropped vertically. With mecha armor, check that the far shoulder stays inside the frame after the crop. If you plan to use the same clip horizontally and vertically, review both crops before you settle on a take.
Save one short comparison clip for each outfit and label it by look and angle. When you come back later, a name like “frog front gesture” is easier to find than a list of timestamps. For an edit, use the clearest moment for the opening frame and cut after the motion settles. If the outfit is only readable in one frame, use that still as a reference for a steadier second take. Give the viewer enough time to see the costume before you cut away.
When you’re ready to use your own garment image, pick one with a clear front view and a visible outline. Keep the first test small. Choose one feature you want to see, such as the collar or shoulder, and one movement that will show it. You can open the AI clothes changer and start with a built-in outfit before trying a reference of your own.